HELP & SUPPORT
Social To Posts Setup Guide
Follow the complete WordPress workflow from initial setup through Instagram import, display settings, and billing.
Before you start
Check the WordPress and Instagram requirements first. Once they are ready, the rest of the workflow can be completed from WordPress.
Steps
- Use WordPress 6.0 or later and PHP 8.0 or later.
- Switch the Instagram account to a professional Business or Creator account.
- Activate Social To Posts and open its menu in WordPress admin.
- Install Advanced Custom Fields first only when you want to map imported images to ACF image fields. ACF is optional.
What the Social To Posts service does
The WordPress plugin and external service divide responsibilities so Meta API maintenance and local draft creation remain reliable.
Steps
- The service manages Instagram authorization, protected access tokens, Meta API communication, incremental sync, and the media cache.
- The service is maintained when Meta changes API versions or authorization requirements.
- WordPress validates selected items, saves images, creates drafts, applies initial SEO settings, and renders imported content.
- Already imported WordPress posts and images remain on the site if the service is temporarily unavailable.
Initial setup
Connect your plugin account and WordPress site with the focused setup wizard.
Steps
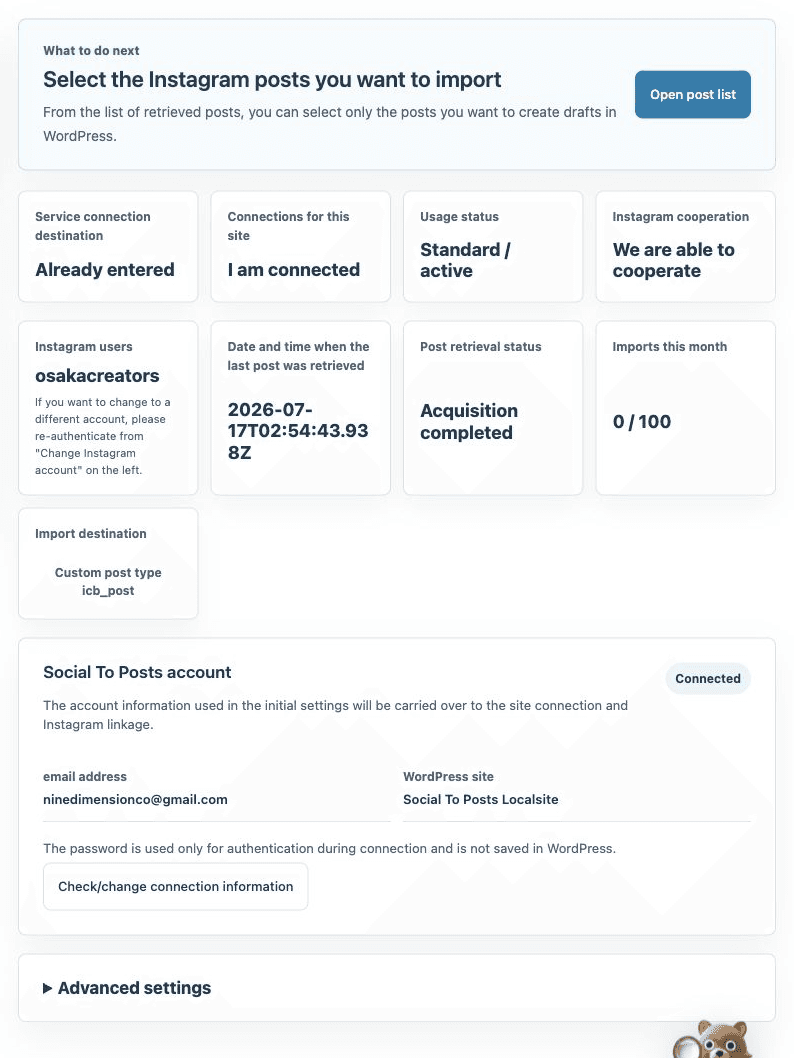
- Select Start initial setup on the dashboard.
- Continue with Google, or use an email address and password.
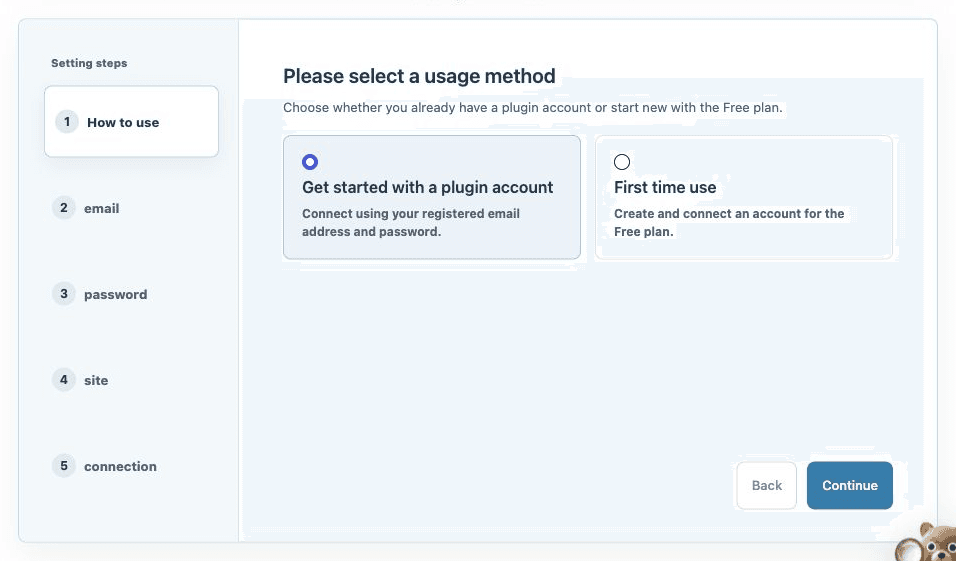
- Choose an existing plugin account or create a Free account.
- Confirm the email, password, and site details, then connect the site.
- Setup is complete when the site status says Connected.
Connect Instagram
Open Instagram authorization from WordPress and allow access to the account whose posts you want to import.
Steps
- Select Connect Instagram in Primary actions.
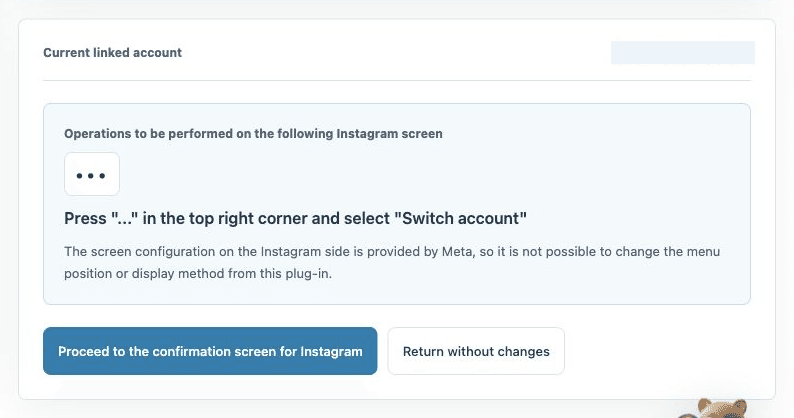
- Confirm that the account displayed by Instagram is the account you want to use.
- To use another account, open the three-dot menu in the upper-right corner and choose Switch accounts.
- Approve access and return to WordPress.
- The connection is ready when Instagram status says Connected.
Fetch Instagram posts
Synchronize Instagram post data to the service and refresh the list available in WordPress.
Steps
- Select Fetch Instagram posts in Primary actions.
- Keep the page open until synchronization finishes.
- Select Choose posts to import to open the post list.
- Use Fetch Instagram posts and refresh when you need newer or older items.
Choose and import posts
Select only the Instagram posts you need and create editable WordPress drafts.
Steps
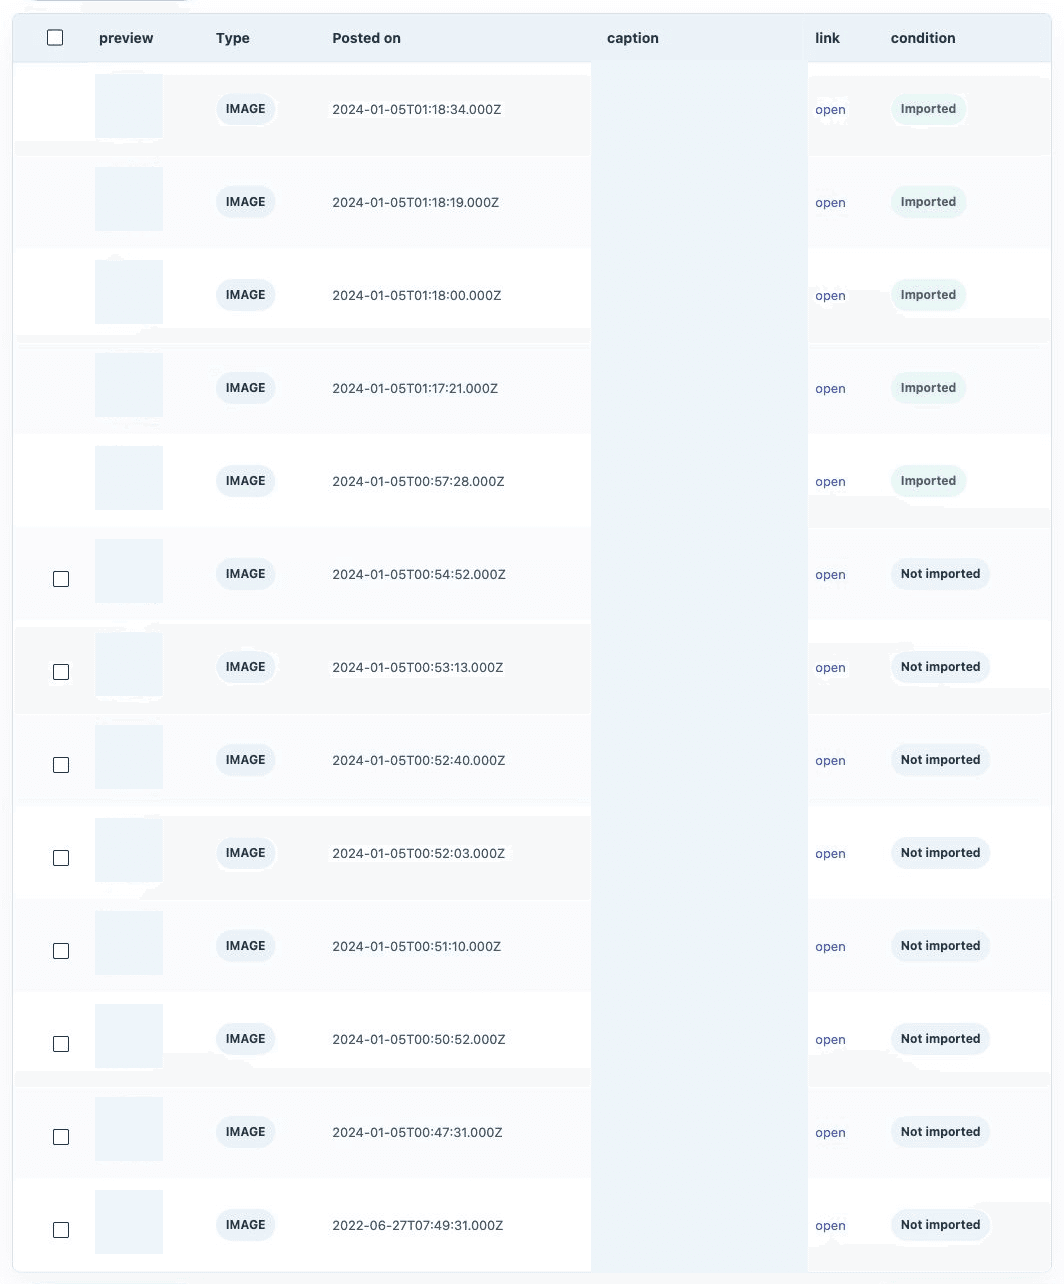
- Select the checkbox beside each Instagram post you want to import.
- Select Import selected posts. Multiple posts are processed one at a time with visible progress.
- After DONE!! appears, confirm that each successful item is marked Imported.
- Open the WordPress post or custom post type list, edit the draft, and publish it when ready.
Import settings
Set the destination, body, image layout, SEO behavior, and optional ACF mapping before importing posts.
Steps
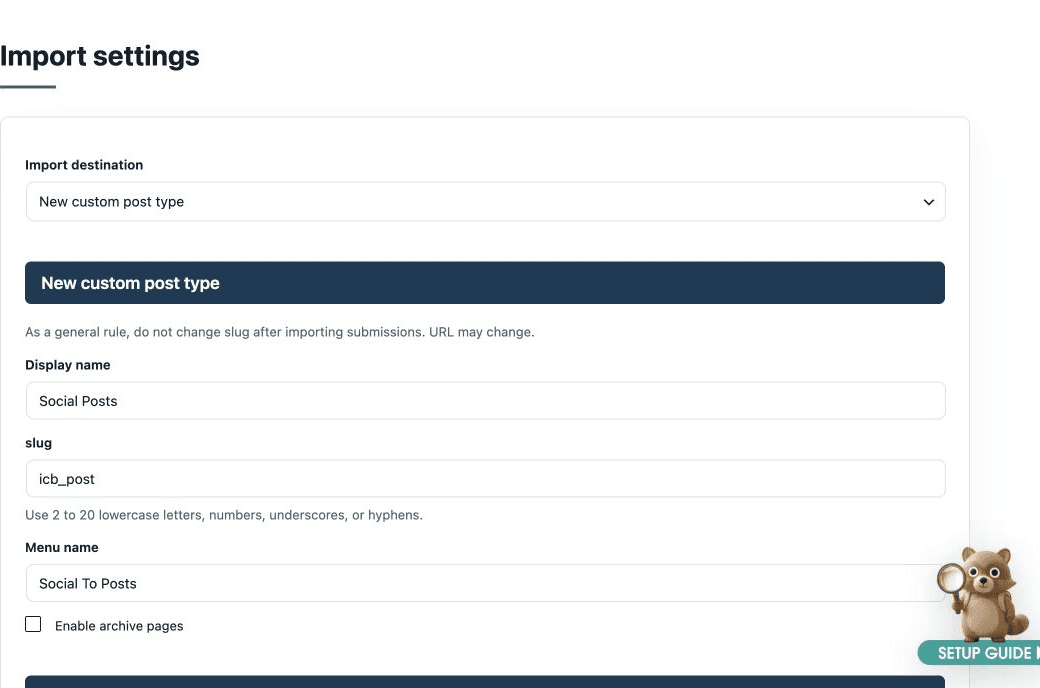
- Choose standard posts or a new Social To Posts custom post type as the destination.
- For a new custom post type, set its label, slug, menu name, and archive option. The slug is locked after the first import.
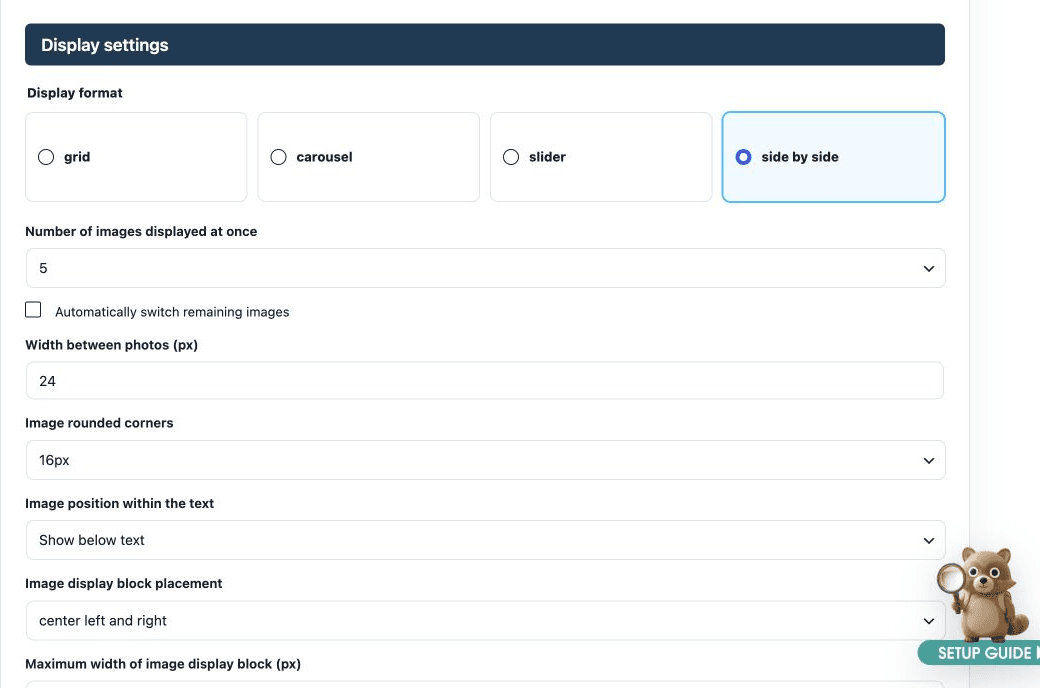
- Configure caption paragraphs, hashtag removal, Instagram dates, and whether the image block appears above or below the text.
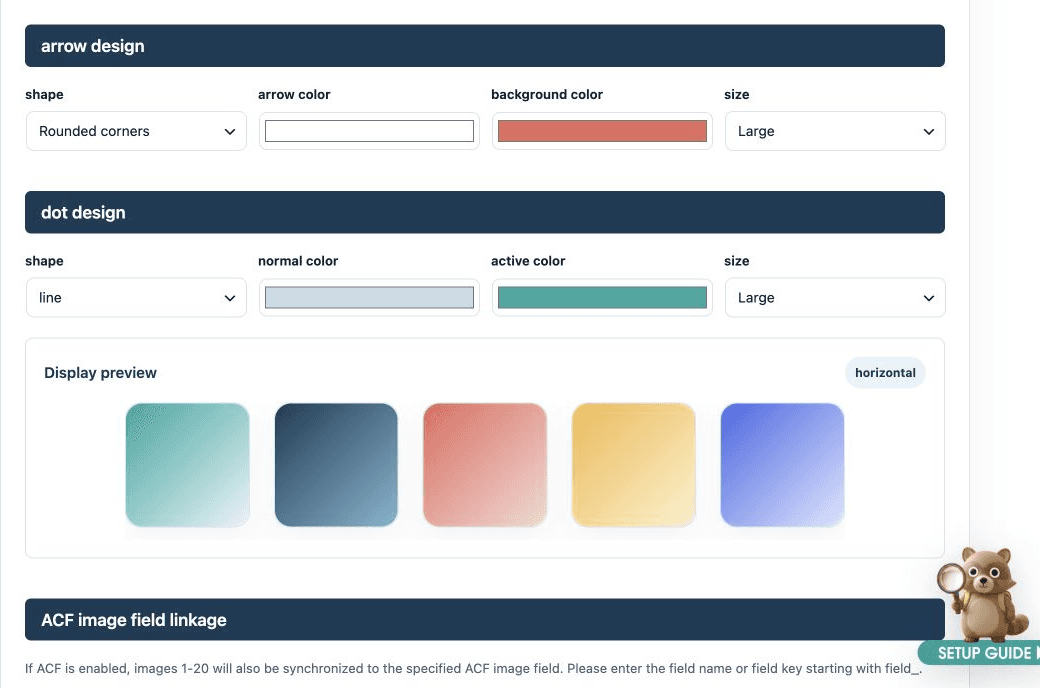
- Choose grid, carousel, slider, or horizontal display and preview spacing, corners, width, alignment, arrows, and dots.
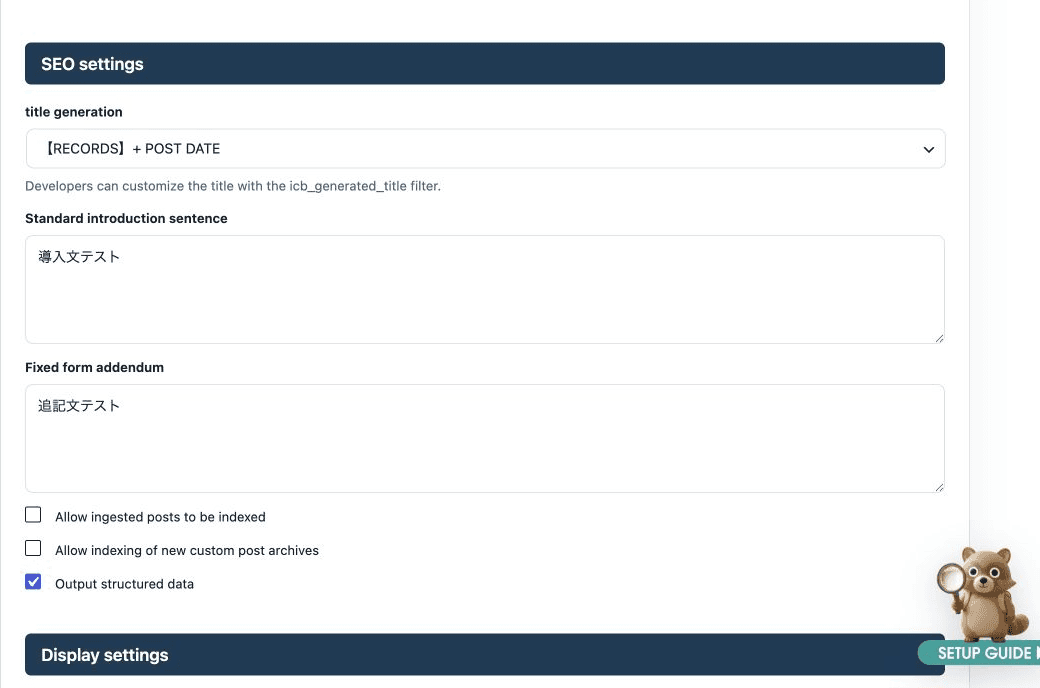
- Configure title generation, before/after text, noindex behavior, and structured data under SEO settings.
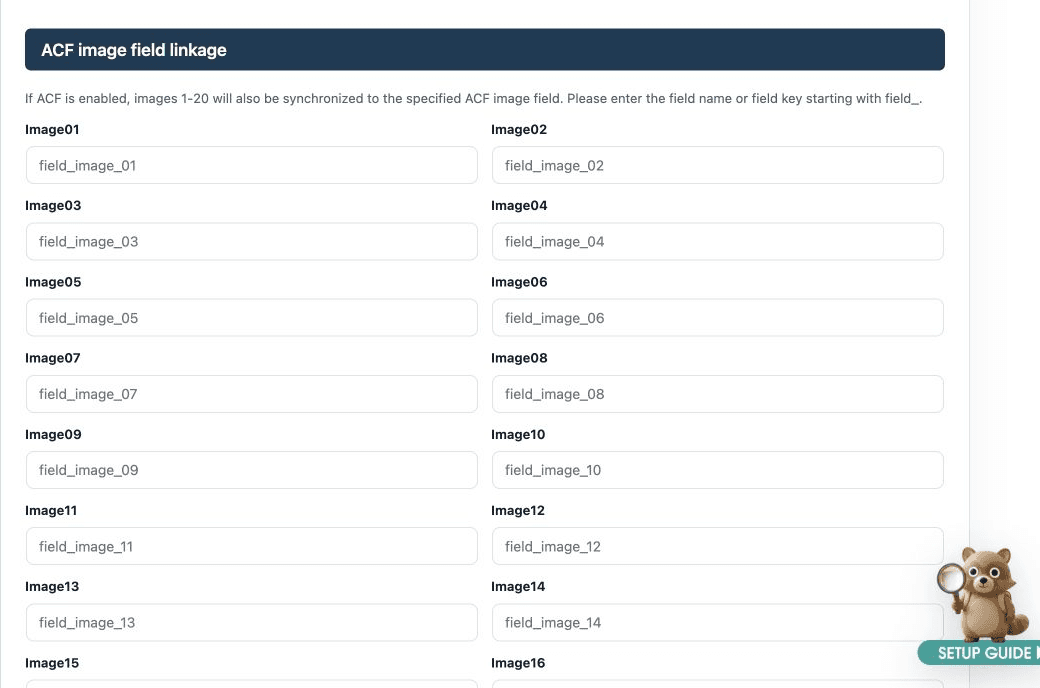
- Optionally map image 01–20 to ACF image field names. The first image is also used as the featured image.
- Save changes before importing posts.
Finish the draft with SEO in mind
Social To Posts prepares the initial SEO fields. Add business-, location-, and service-specific information before publishing so the page is more than a copy of the social caption.
Steps
- Review the generated caption- or date-based title and add a location, service name, or case-specific detail when useful.
- The caption is imported as editable paragraphs with its line breaks. Add WordPress-only context, pricing, background, or practical details for visitors.
- Review each caption-derived alt-text draft against the image and edit it so it accurately describes the visible content.
- Add appropriate before/after text, categories, an excerpt, internal links, and a publication date.
- Confirm noindex behavior and SocialMediaPosting structured data under SEO settings before publishing.
Plans and billing
Review your plan, monthly usage, paid period, invoices, and subscription actions from WordPress.
Steps
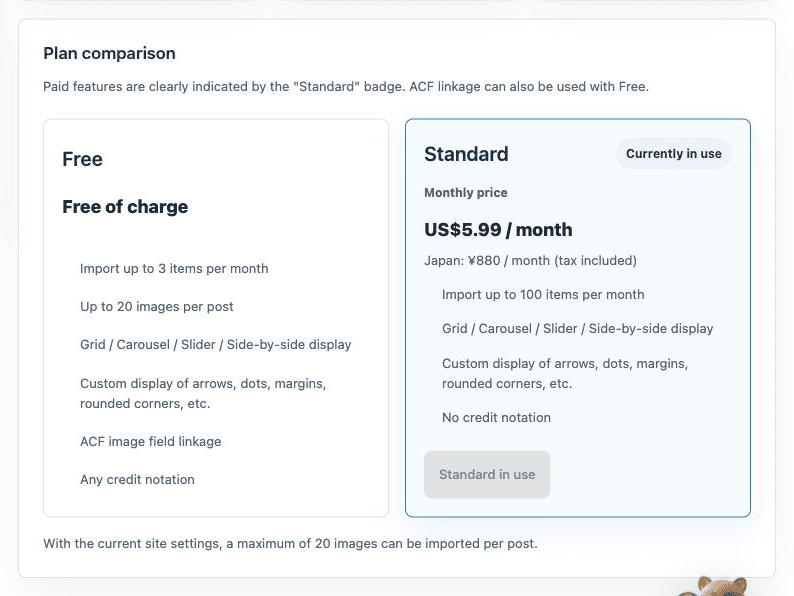
- Open Plan to compare Free and Standard and check current usage.
- Choose Upgrade to Standard and complete card payment on Stripe Checkout.
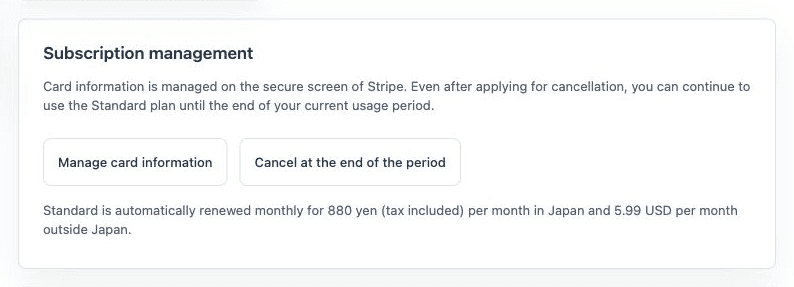
- Open Billing to review the access end date, manage the card, or cancel at period end.
- Open invoice PDFs from the payment history when available.
Troubleshooting
Open Support/Troubleshooting in WordPress to check the connection and recent import results first.
Steps
- Run diagnostics to check the service connection, uploads directory, and WordPress environment.
- Follow the plain-language error message, then reconnect, refetch, or retry only unimported posts.
- For image-save errors, check wp-content/uploads permissions and available disk space.
- If the issue remains, send the diagnostic result, time, action performed, and WordPress/PHP versions to support.

Prefer to have the initial setup handled for you?
We can assist with connecting WordPress and Instagram and configuring your import settings.